Overview
In September 2025, Exchange Online permanently removed support for Basic authentication with Client Submission (SMTP AUTH). Since then, applications and devices are no longer able to use Basic auth as an authentication method and must use OAuth when using SMTP AUTH to send email. (compare also: MS Exchange Team Blog)
You can use the OAuth authentication service provided by Microsoft Entra to enable your metasfresh application to connect with IMAP, POP, or SMTP protocols to access Exchange Online in Office 365. (compare also: Microsoft Learn)
In order to get authorized access to a user’s Outlook mail data in a personal or organization account, you can use Microsoft Graph. With the appropriate delegated or application mail permissions, your app can access the mail data of the signed-in user or any user in a tenant.
The Microsoft Graph API supports accessing data in users’ primary mailboxes and in shared mailboxes. The data can be calendar, mail, or personal contacts stored in a mailbox in the cloud on Exchange Online as part of Microsoft 365, or on Exchange on-premises in a hybrid deployment. (compare also: Microsoft Learn)
This guide will help you obtain the information required to connect your metasfresh app with your Microsoft mailbox which are:
Client IDTenant IDSecret Value
In order to set up MS Entra to integrate metasfresh ERP using the MS Graph service, please proceed as follows:
Steps
- Log on to the Microsoft Entra admin center or sign up first for an account at https://entra.microsoft.com/.
Register your Application
-
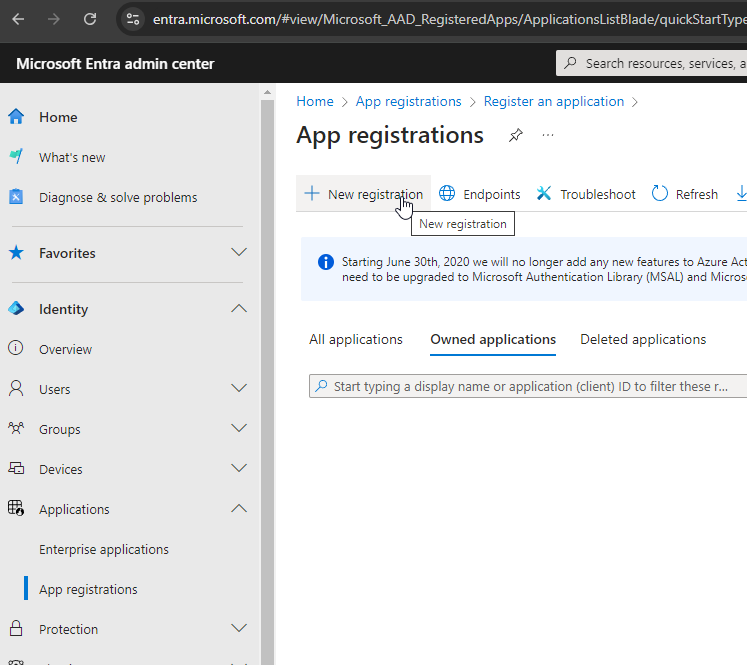
In your account, go to “App registrations” and click New registration. An overlay window opens up.
Click to view screenshot
-
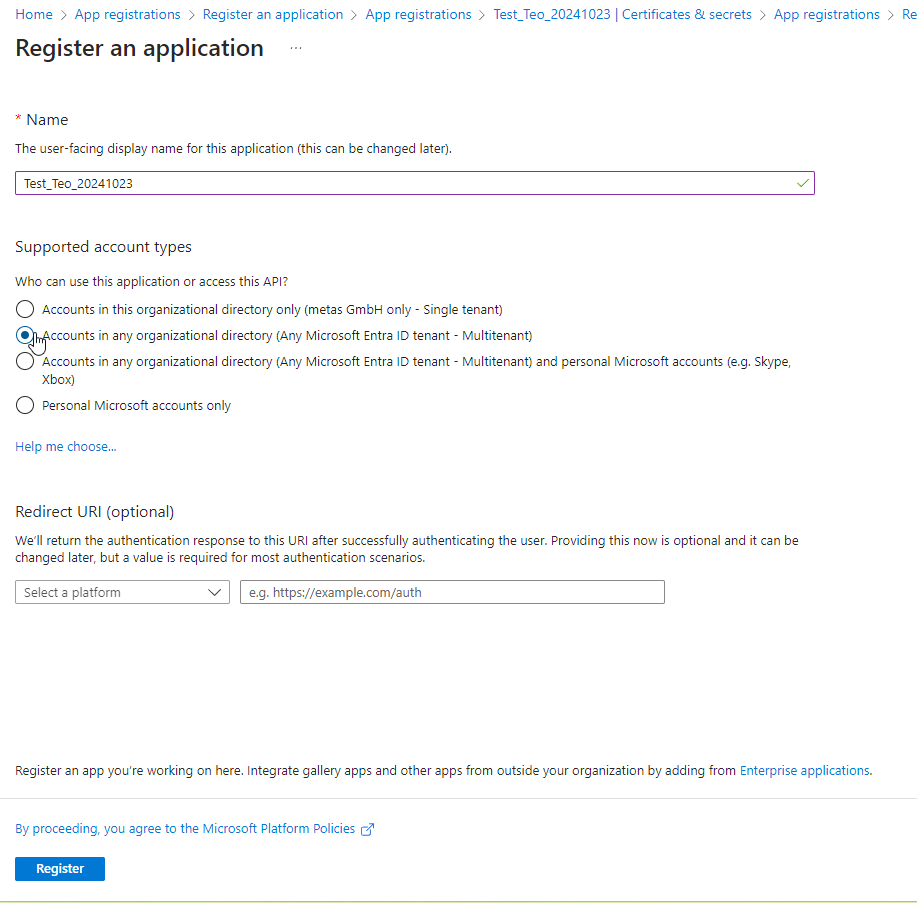
Enter a Name (user-facing display name) for your application.
Under Supported account types select the option Accounts in any organizational directory (Any Microsoft Entra ID tenant - Multitenant) for who can use the app or access the API.
Click to view screenshot
- Click
 to save the app settings.
-
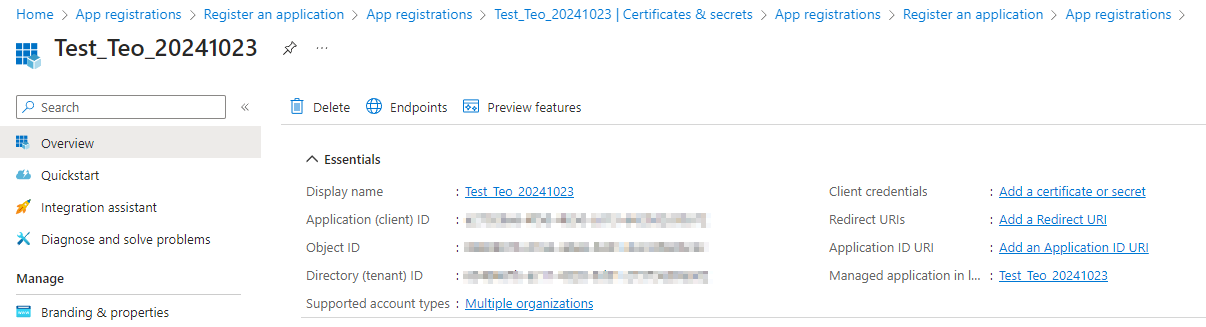
Go to “Overview” to see the app information such as display name, app (client) ID, directory (tenant) ID, etc.
Click to view screenshot
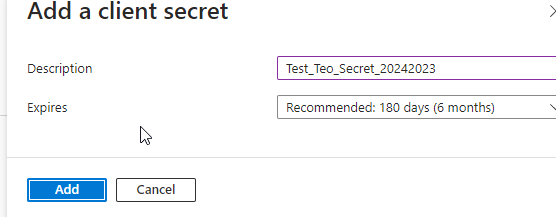
Add a Client Secret
-
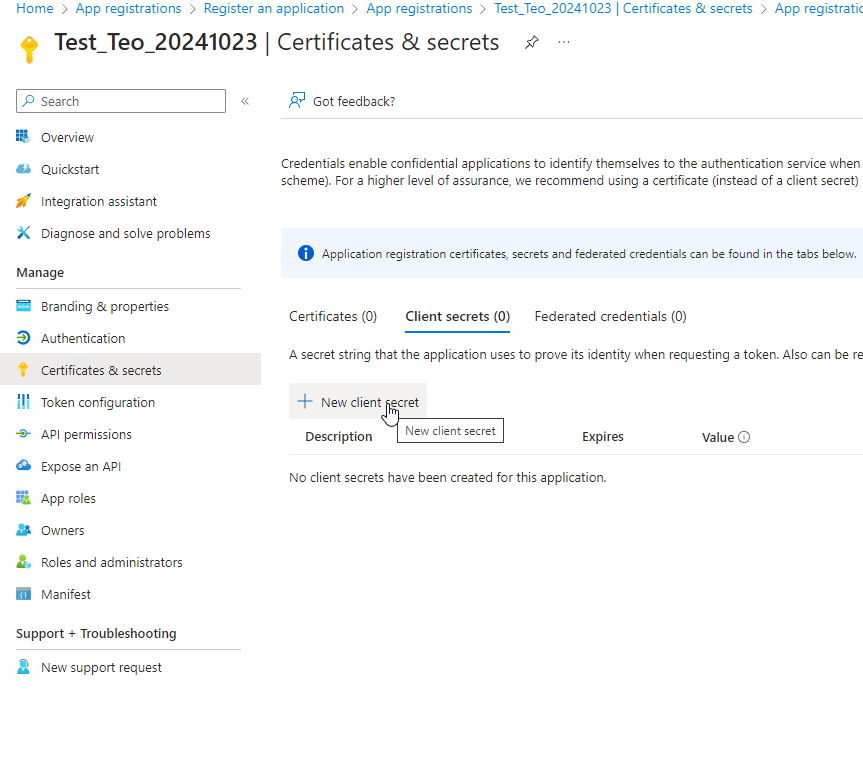
Go to “Certificates & secrets” and click New client secret. An overlay window opens up.
Click to view screenshot
-
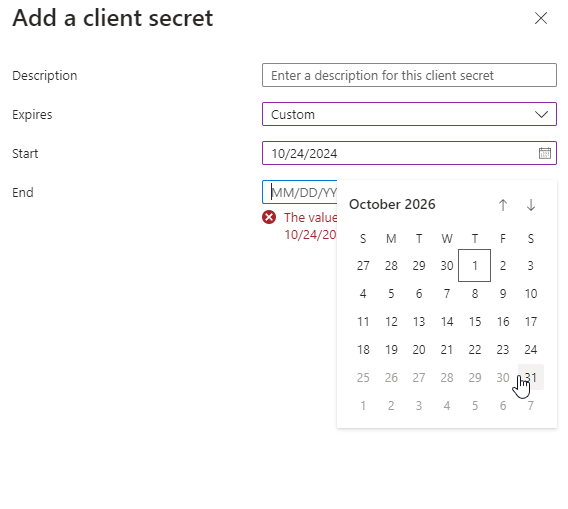
Fill in the mandatory fields (e.g. Description, Expires, etc.)
Click to view screenshot
Note: If you want to set a custom expiry date, keep in mind that the secret’s maximum expiration time is 2 years.
Click to view screenshot
| Important note: Note down the Secret! |
Client secret values cannot be viewed, except for immediately after creation. Be sure to save the secret when created before leaving the page.
Click to view screenshot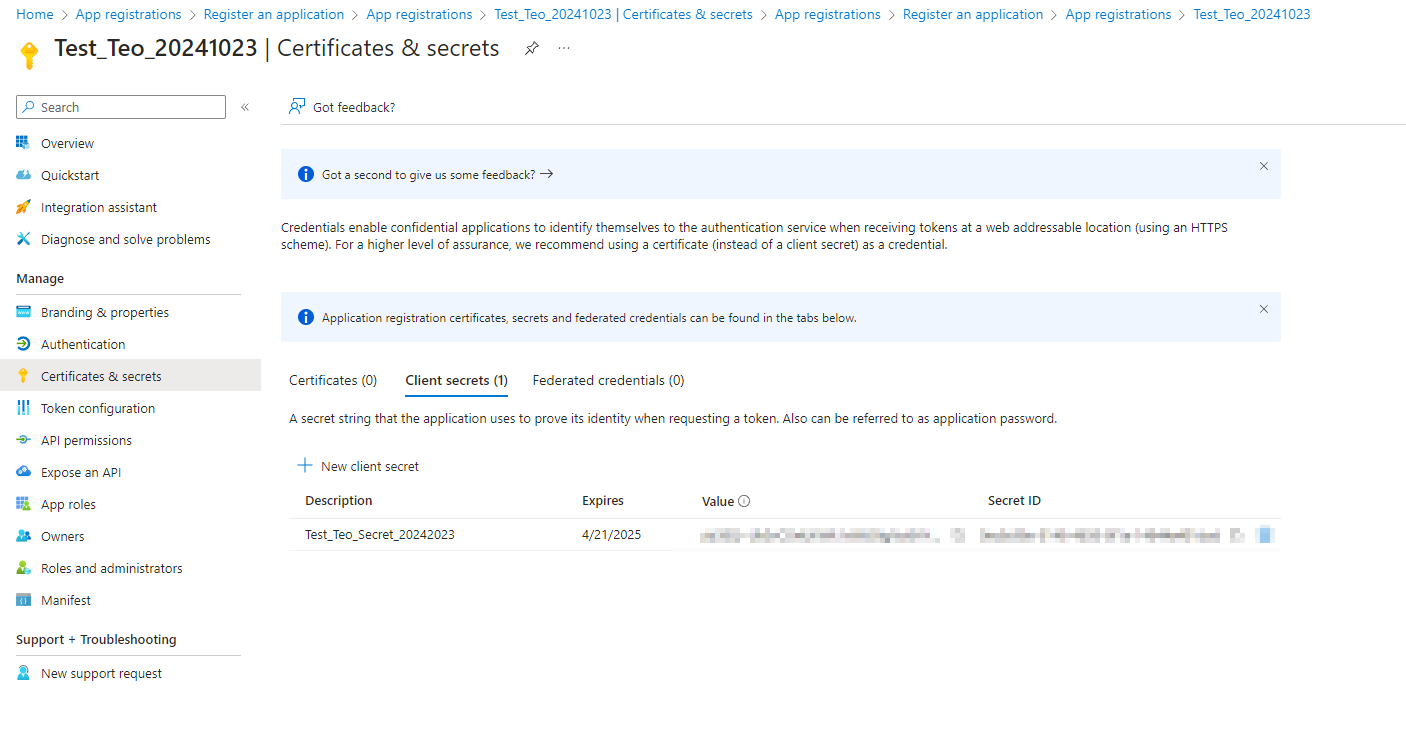 |
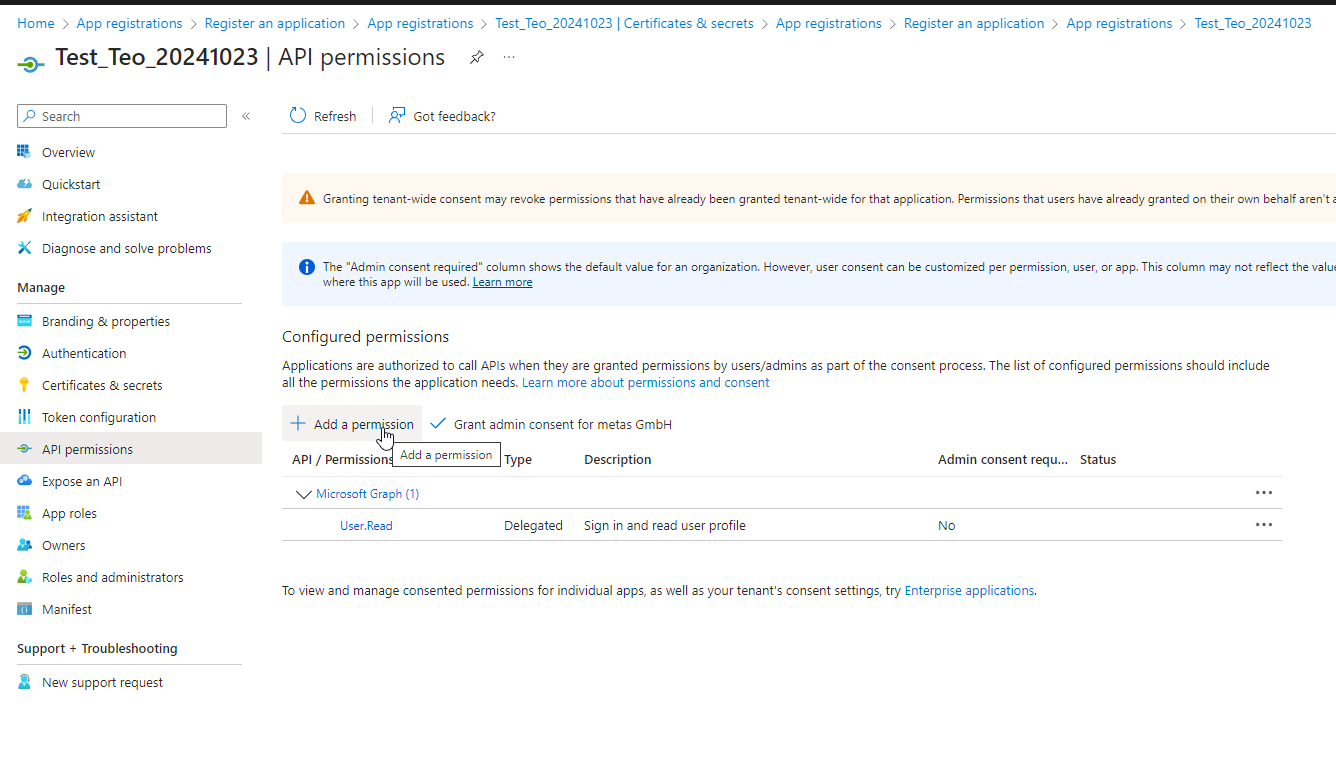
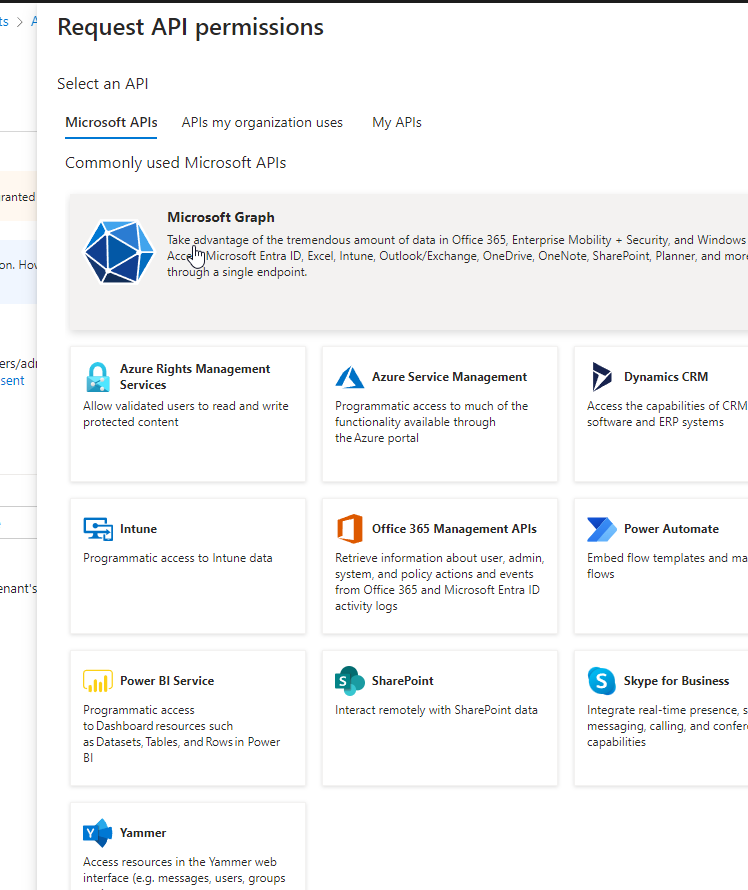
Add API Permissions
-
Go to “API permissions” and click Add a permission. An overlay window “Request API permissions” opens up.
Click to view screenshot
-
Under “Microsoft APIs” select the option Microsoft Graph.
Click to view screenshot
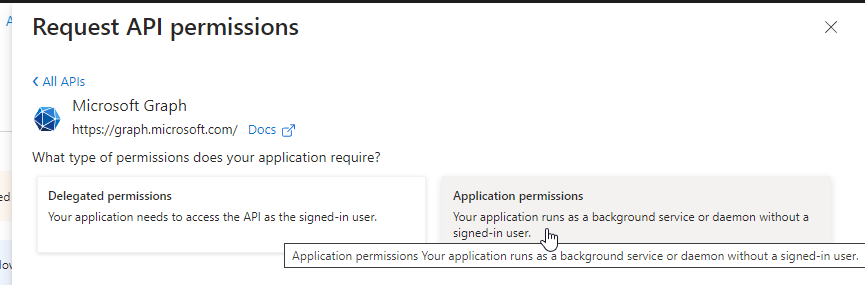
-
Select the option Application permissions as the type of permission your app requires.
Click to view screenshot
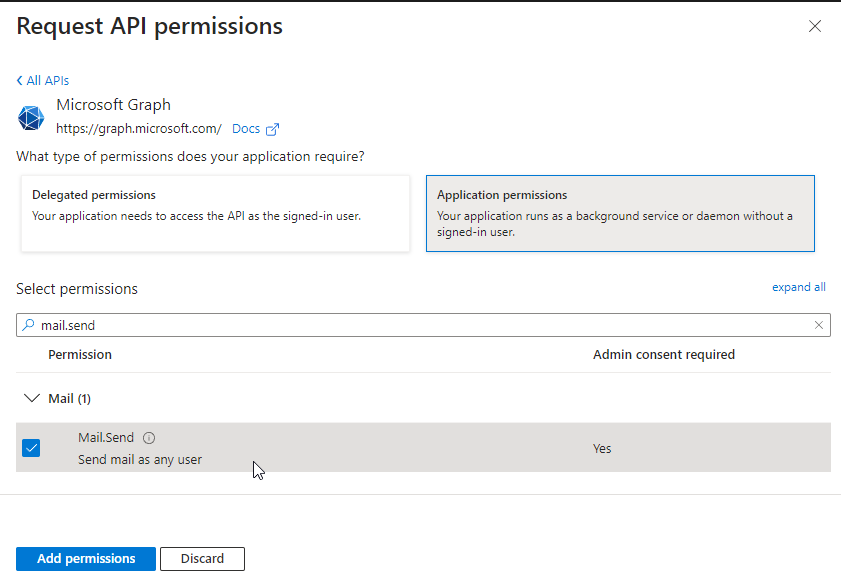
-
In the search box under “Select permissions”, search for mail.send, select the homonymous option from the results and click  .
.
Click to view screenshot
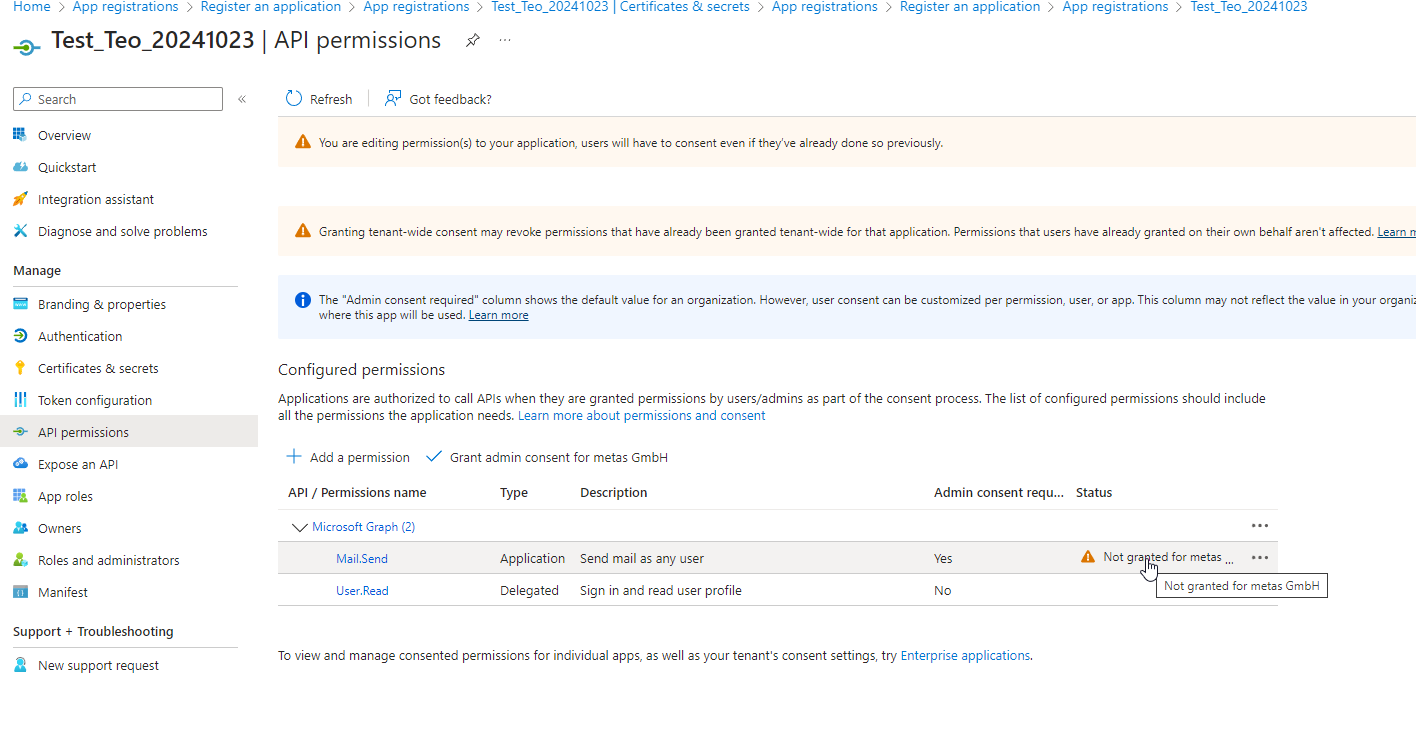
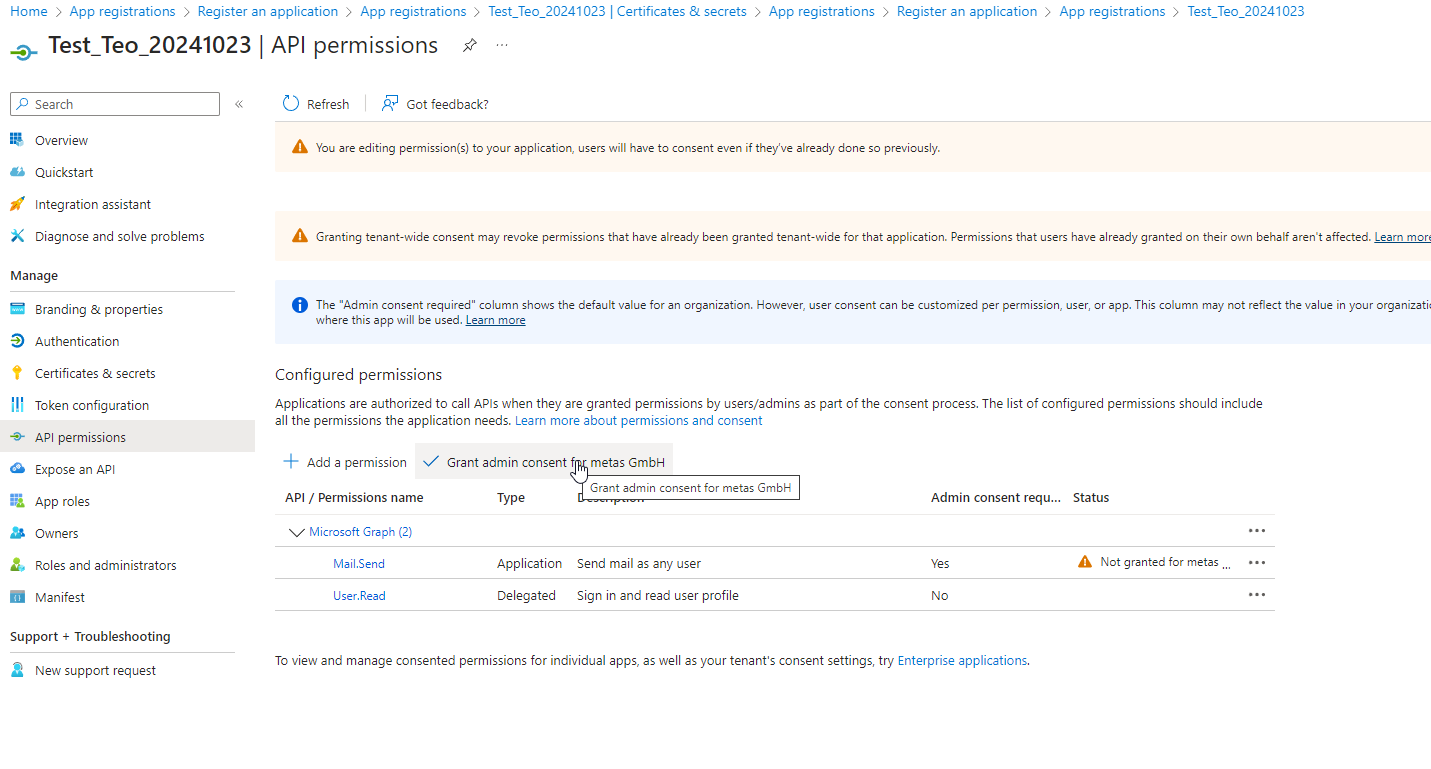
Grant API Permissions
After adding new API permissions, you need to grant them for your organization.
Click to view screenshot
-
Click Grant admin consent for [your organization].
Click to view screenshot
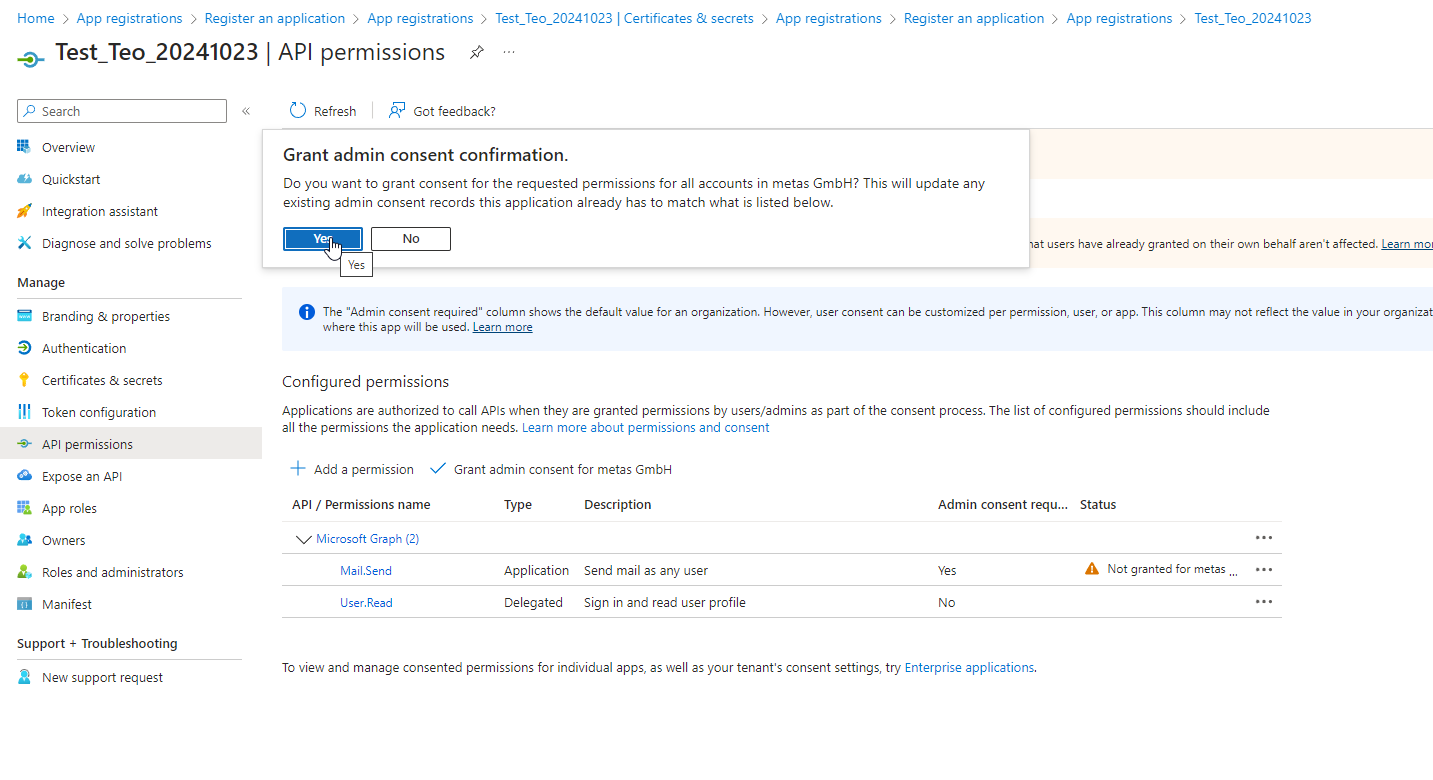
-
Click YES in the dialog box to confirm granting admin consent.
Click to view screenshot
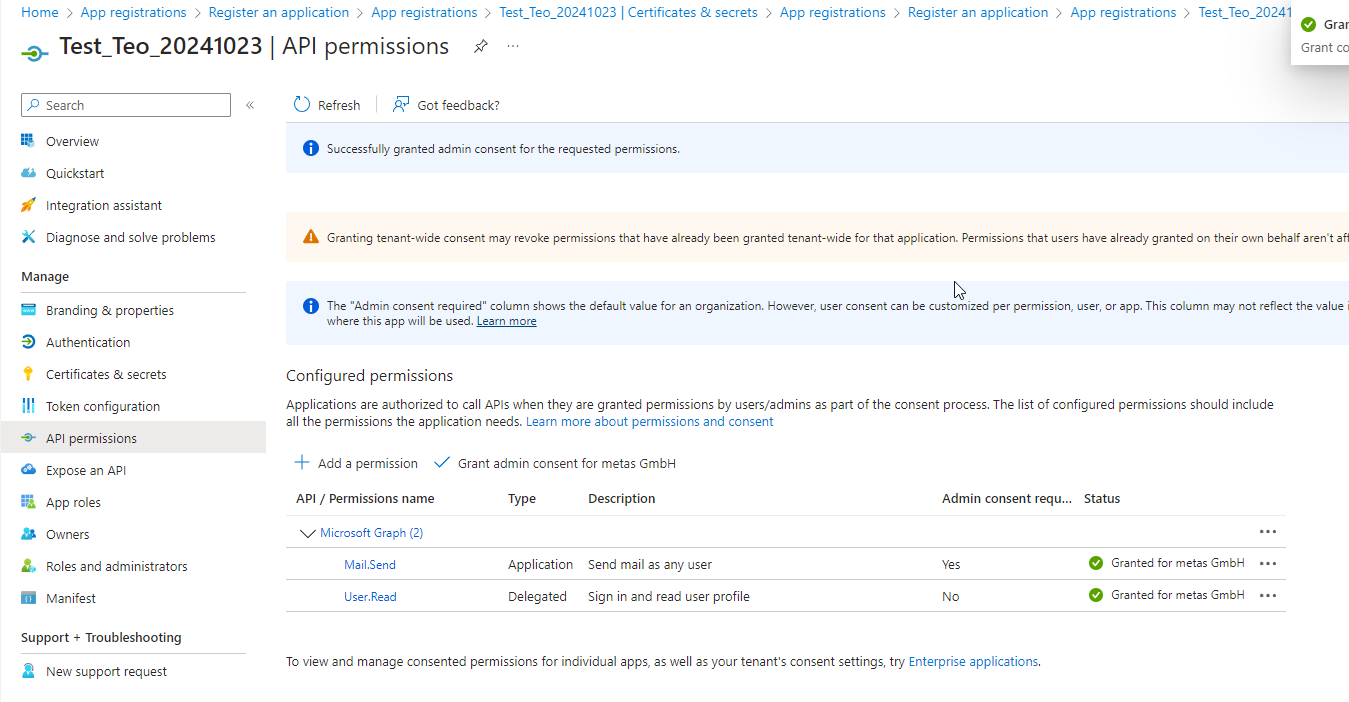
-
Now you successfully granted admin consent for the requested permissions.
Click to view screenshot
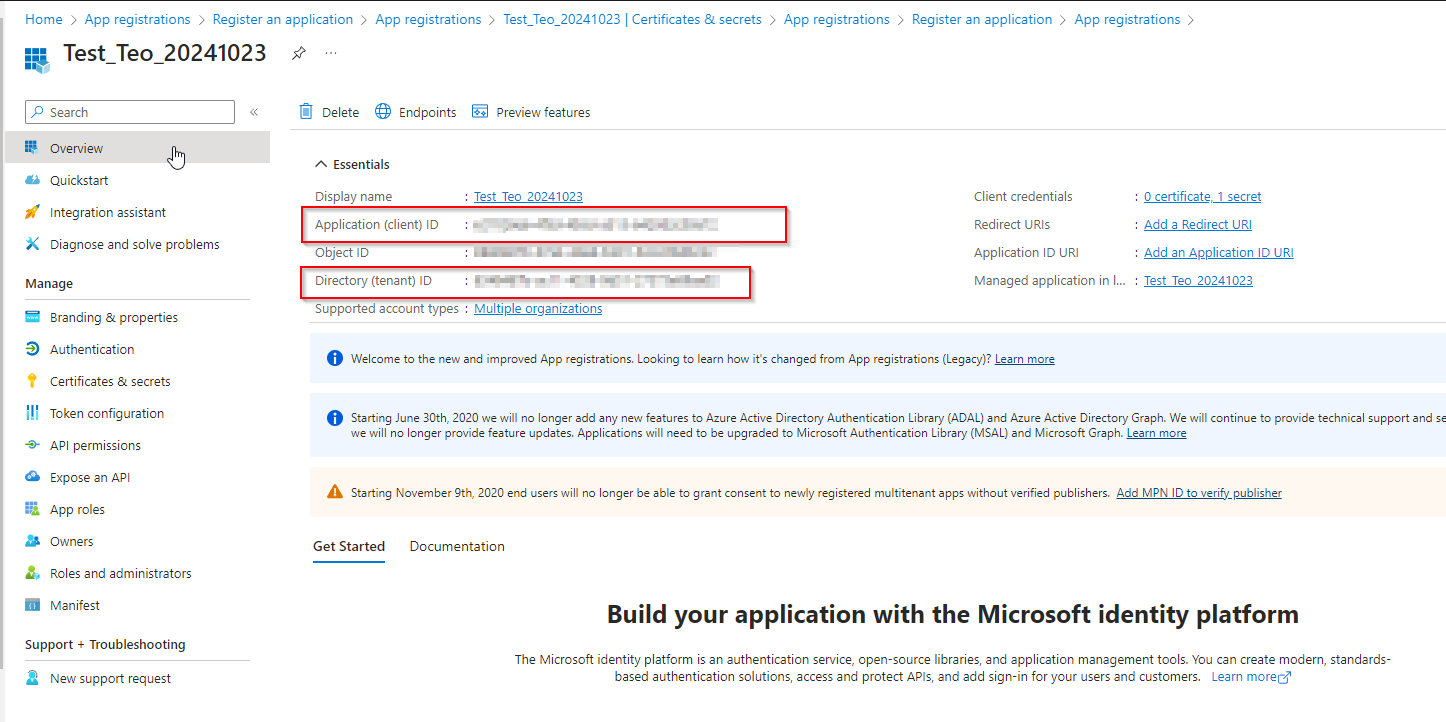
Retrieve the Client ID and Tenant ID
After successfully completing all steps described above, you will find the information required to connect your metasfresh app with your Microsoft mailbox in the “Overview” section of the MS Entra menu.
Click to view screenshot
| Important note |
| With the configuration above, the application has the permission to send mail as ANY user in the organization. To limit access to a specific user, additional configuration is required (see “Next Steps” below). |
Error Messages
These error messages point out that SMTP authentication is not supported.
Server error
Invalid Username/Password: 535 5.7.139 Authentication unsuccessful, SmtpClientAuthentication is disabled for the Mailbox.
Server error
550 5.7.30 Basic authentication is not supported for Client Submission.
Next Steps (optional)
- Limit email access to specific users (Microsoft Exchange Mailbox).
View source file on GitHub.com