Steps
Create a Warehouse
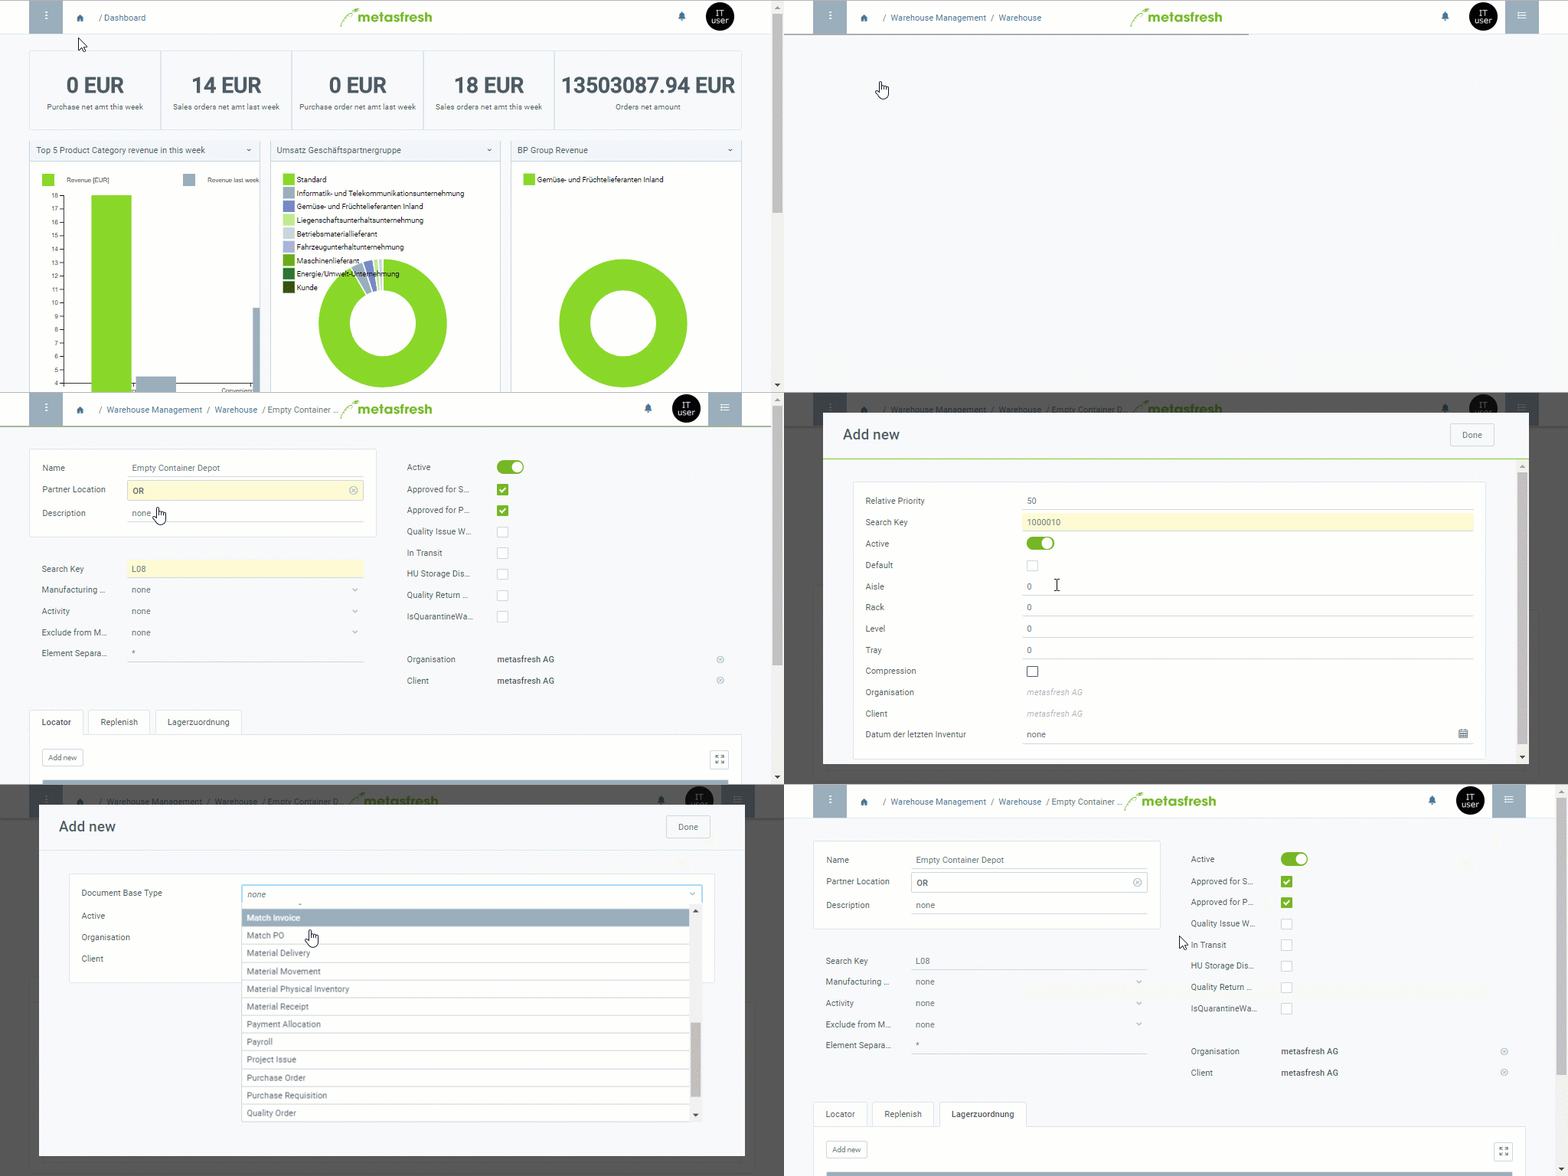
- Open “Warehouse” from the menu.
- Add a new warehouse.
- Give the warehouse a Name, e.g., “Empty Container Depot”.
- Depending on the version build, one of the following steps may apply:
- a) In the field Partner Location, enter part of the location name and click on the matching result in the drop-down list.
- b) Optional (Managing partner warehouses): In the field Business Partner (i.e. Supplier for provision), remove your default organization. Then in the first input area of the line, enter part of the name or number of the business partner providing the services/materials and click on the matching result in the drop-down list. Now in the same way, pick a Partner Location in the next eponymous part of the line and, if required, a User/Contact.
- Pick a Manufacturing Plant, if available.
Note: Manufacturing plants are required for product planning and automatic order checkups.
- Optional: Pick a Warehouse Type.
- Go to the record tab “Locator” at the bottom of the page and click
 . An overlay window opens up.
- In each of the fields Aisle, Rack, Level and Tray enter the value 0.
- Click “Done” to close the overlay window and add the storage place to the list.
Here you can select the Document Base Types for which the warehouse shall be used, e.g., Sales Order, Purchase Order, Inventory, Material Receipt, etc.
- Go to the record tab “Lagerzuordnung” (Warehouse Assignment) at the bottom of the page and click
 . An overlay window opens up.
- Select a Document Base Type, e.g., Sales Order.
- Click “Done” to close the overlay window and add the document base type to the list.
Note: You can assign any number of document base types to a warehouse. As an example, please take a look at the warehouse entry “Main Warehouse”, which is already configured appropriately.
Example

View source file on GitHub.com
 . An overlay window opens up.
 . An overlay window opens up.
 . An overlay window opens up.