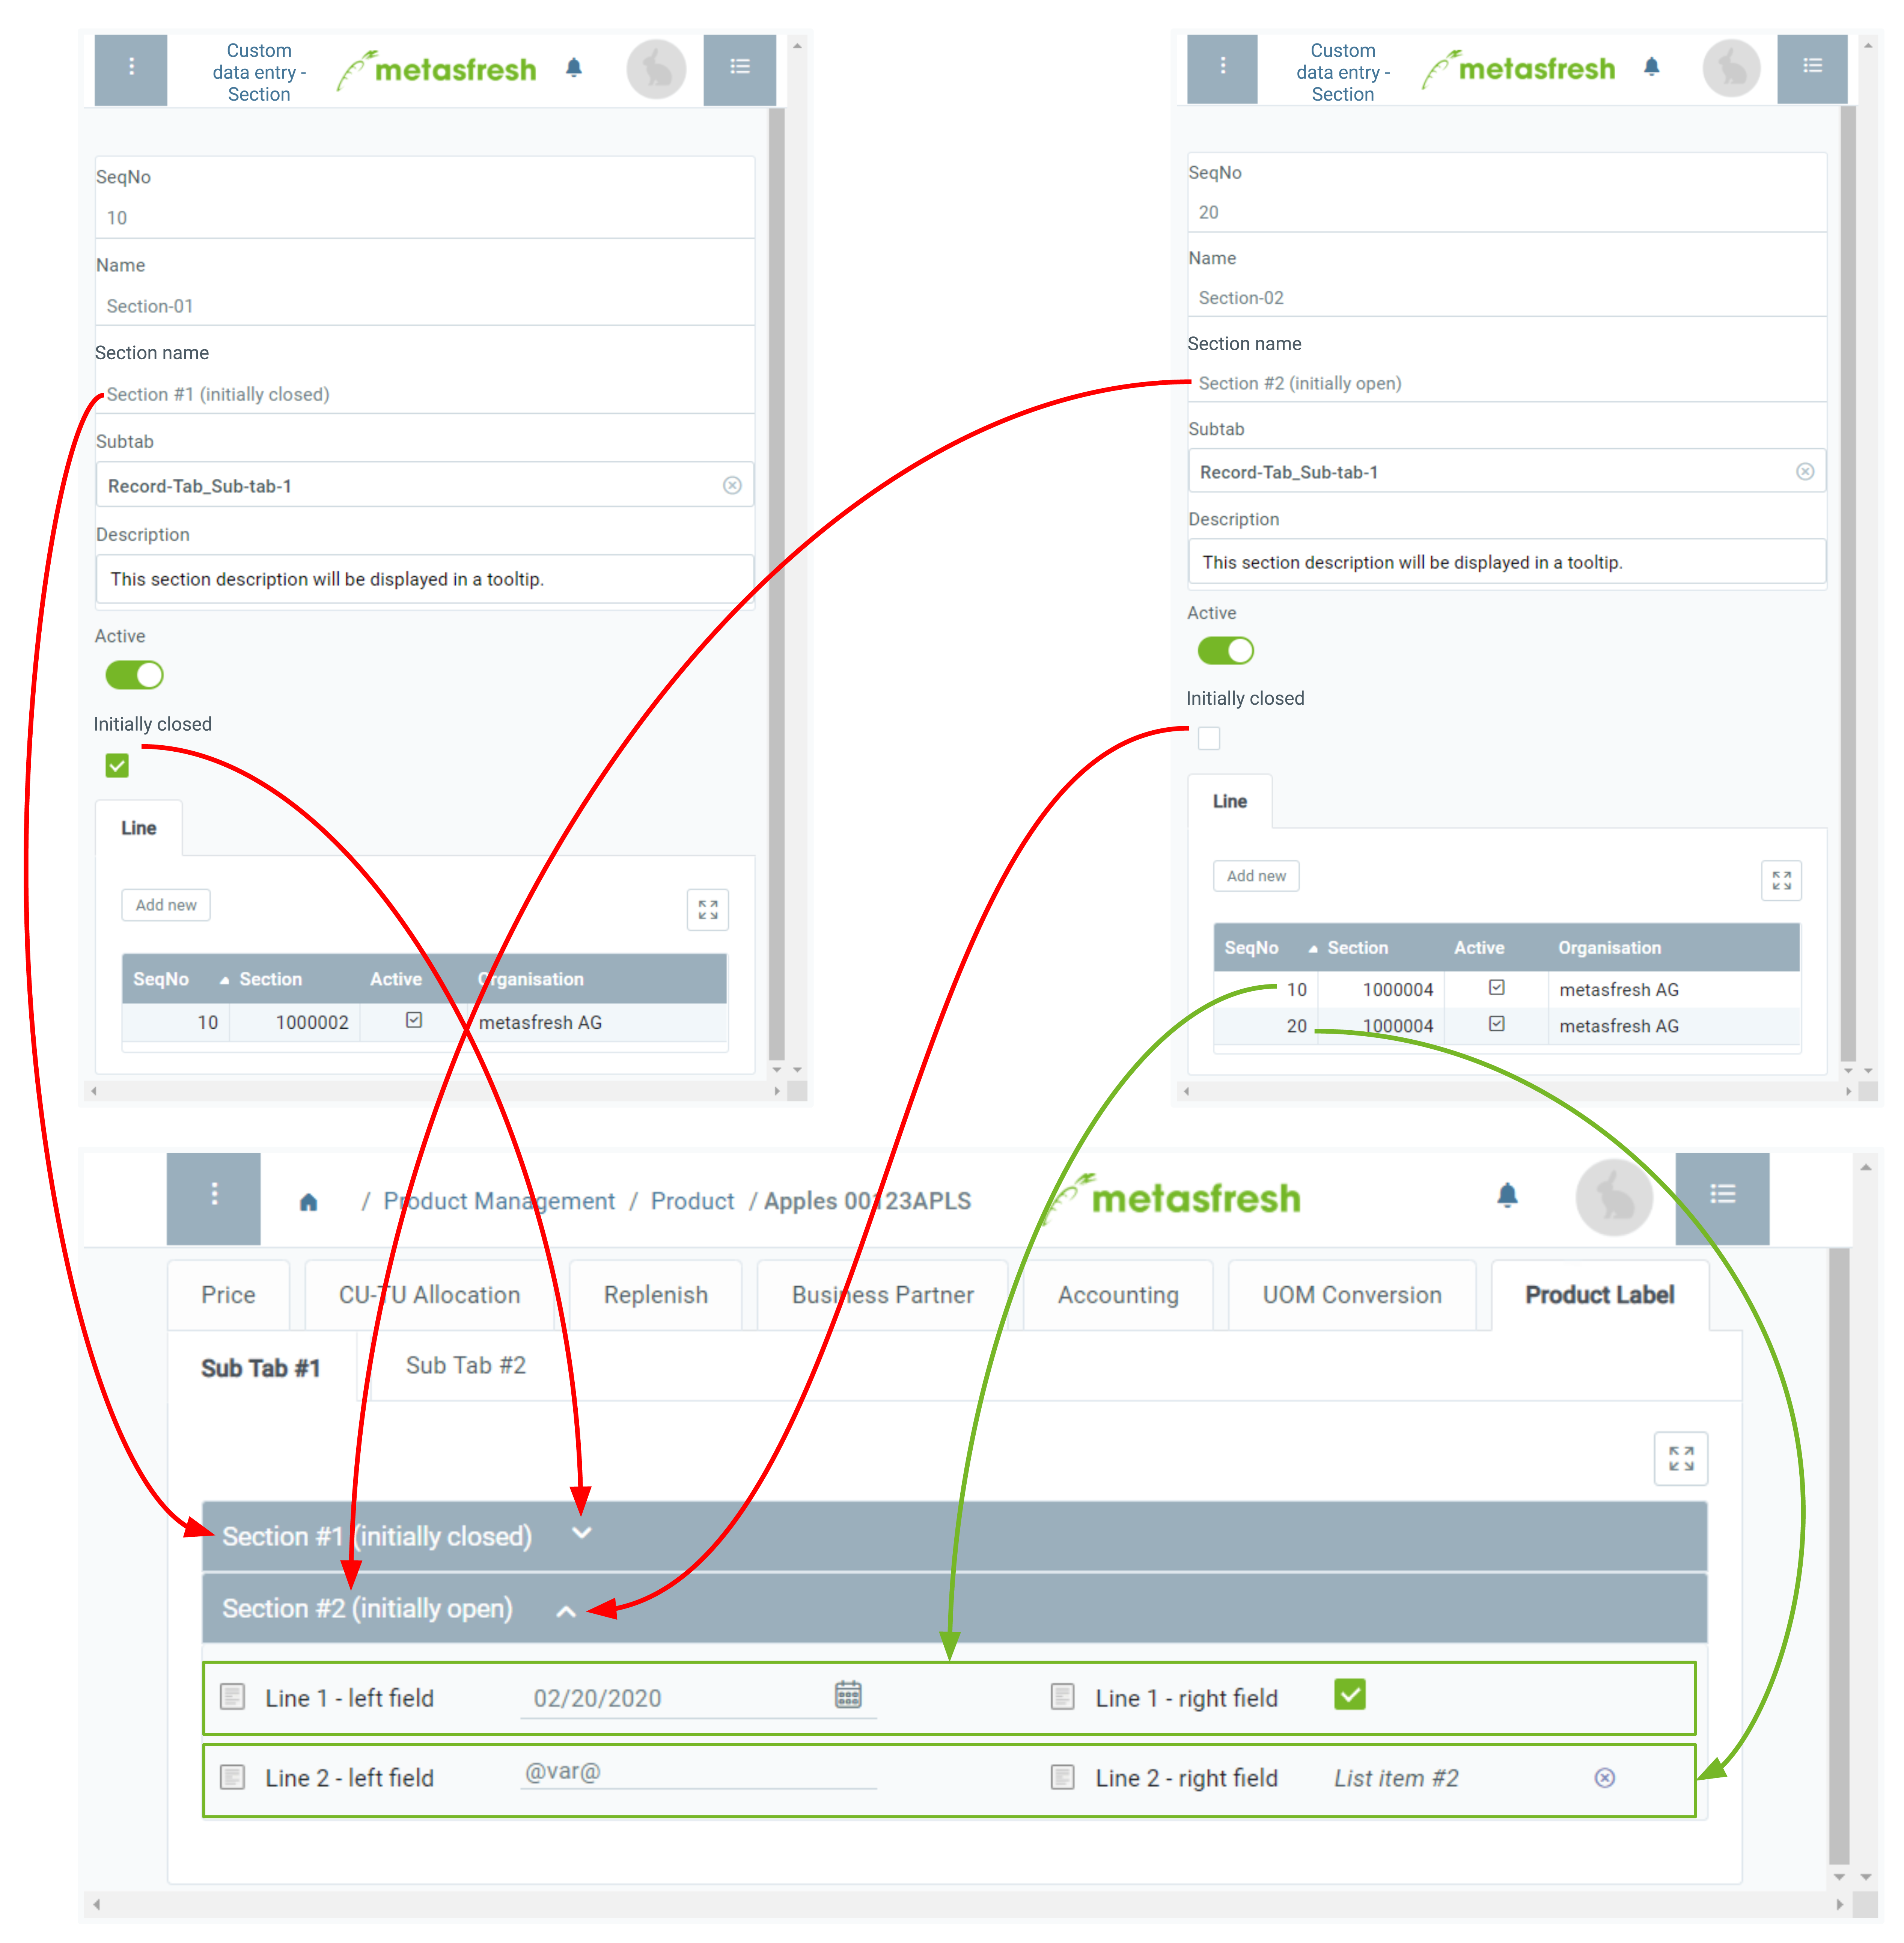
 . An overlay window opens up.
Note 1: Repeat steps 1 to 2 to add further lines.
Note 2: In case of multiple lines for the same section you can specify their order via the field SeqNo.
Note: This name is for internal reference only and is not displayed as a section name.
Note: This name will be displayed in the appropriate place in the subtab.
Note: In case of multiple sections for the same subtab you can specify their order via the field SeqNo.
 . An overlay window opens up.
Note 1: Repeat steps 1 to 2 to add further lines.
Note 2: In case of multiple lines for the same section you can specify their order via the field SeqNo.
| Important note: |
|---|
| The custom record tab along with sections and lines will only be displayed in the respective input window if the section lines contain fields. |
